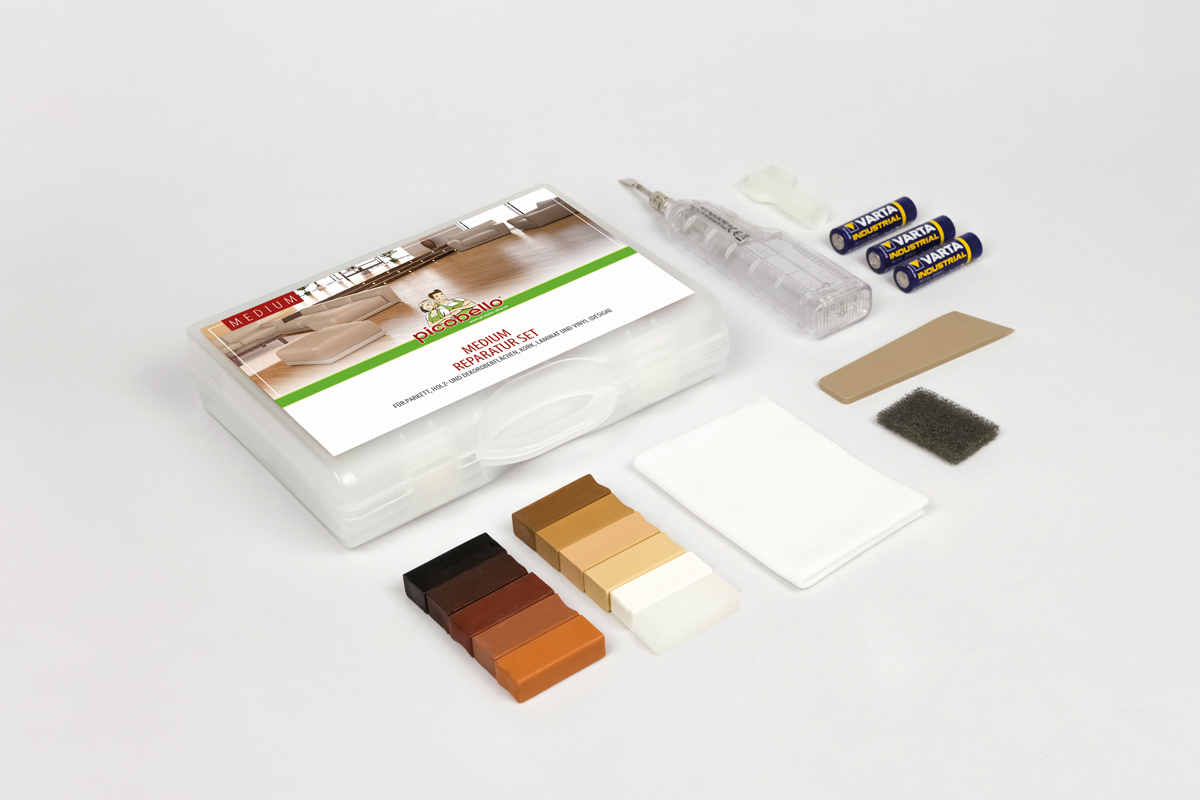
Picobello MEDIUM Repair Set (for wood/decor surfaces)
Product number:
G61404
Product information "Picobello MEDIUM Repair Set (for wood/decor surfaces)"
Uses:
For repairing scratches, small holes, pressure marks and edge damage. Can be used on real wood and decorative surfaces such as parquet, laminate, interior doors or furniture, kitchen fronts as well as cork and vinyl (design floors). Recommended for indoor use.
Set contents:
11x Hard Wax
1x Battery Melter
3x Battery (Micro 1.5 V AA)
1x Spatula
1x Sanding Pad (coarse)
1x Lint-free Cloth
1x illustrated instruction sheet.
| To be used on: | On surface and/or materials: |
|---|---|
| Deep scratches | Wood Windows, indoor |
| Pressure marks | Wood Doors, indoor |
| Small holes | Wood flooring, lacquered |
| Damaged edges | Laminate flooring |
| Chips | Plastic surfaces |
| Wood surfaces, lacquered | |
| Cork surfaces |
It's that easy ...
Prepare: The damaged area to be repaired must be clean, dry and free of grease. Remove any loose, protruding parts before starting the repair. Press the damaged edge round with the rear edge of the spatula. Filling: Select suitable colour shades. Always select several colour shades from light to dark. Activate the melter as described - the melting blade heats up immediately. Melt small portions of filler, mix and pour into the damaged area. The damaged area must always be slightly overfilled! Curing preparation: After approx. 30 seconds, remove the excess with the planing grooves of the melter. Cleaning: The planing grooves can be cleaned with the comb of the melter cap. Also clean the tip of the melter on the cotton cloth after each melting process while the filler is still liquid. Precise adjustment: If necessary, adjust the colour with additional shades and reproduce the grain. Remove the filler evenly once more. Degrease: Now carefully degrease the filled area with the Sanding Pad. Rework structure: If necessary, use the front edge of the spatula to rework the structure of the surface. TIP: To protect against dust and dirt, we recommend sealing the repaired area with the AQUA Brush Pen Clear Lacquer.
https://www.heinrich-koenig.de/media/46/ab/3a/1724665955/G61404_Picobello_MEDIUM-ReparaturSet_Instructions.pdf
Hard Wax | Hazard statements: Caution! Hazardous respirable dust may be generated during use. Do not inhale dust.


